LinuxのNMSデプロイ
本手順ではいくつかの環境でNMS/NIMをご利用いただくにあたり、セットアップ手順を複数紹介します。 環境にあった手順を実施してください。
こちらの作業は NGINX Management Suite Guide の内容を参照し、実行しています
ラボ環境で動作を確認される場合、作業ホストは ubuntu-host1(10.1.1.5) となります
1. Click HouseのInstall
Install手順はClick Houseのマニュアルを参照しています
Note
こちらの手順は Click House 22.11.2 のInstall手順となります
Installに必要なコンポーネントの取得、Installを行います
sudo apt-get install -y apt-transport-https ca-certificates dirmngr
sudo apt-key adv --keyserver hkp://keyserver.ubuntu.com:80 --recv 8919F6BD2B48D754

echo "deb https://packages.clickhouse.com/deb stable main" | sudo tee \
    /etc/apt/sources.list.d/clickhouse.list
sudo apt-get update
Click HouseのInstallします
sudo apt-get install -y clickhouse-server clickhouse-client
1 ** 省略 **
2 chown -R clickhouse-bridge:clickhouse-bridge '/usr/bin/clickhouse-odbc-bridge'
3 chown -R clickhouse-bridge:clickhouse-bridge '/usr/bin/clickhouse-library-bridge'
4Set up the password for the default user: password << 左の文字列を入力
5Password for default user is saved in file /etc/clickhouse-server/users.d/default-password.xml.
6Setting capabilities for clickhouse binary. This is optional.
7 chown -R clickhouse:clickhouse '/etc/clickhouse-server'
8
9ClickHouse has been successfully installed.
Click Houseのサービスを起動し、状態を確認します
sudo service clickhouse-server start
sudo service clickhouse-server status
 1● clickhouse-server.service - ClickHouse Server (analytic DBMS for big data)
 2     Loaded: loaded (/lib/systemd/system/clickhouse-server.service; enabled; vendor preset: enabled)
 3     Active: active (running) since Tue 2022-12-13 09:37:45 UTC; 3s ago
 4   Main PID: 2774 (clckhouse-watch)
 5      Tasks: 205 (limit: 4652)
 6     Memory: 65.0M
 7     CGroup: /system.slice/clickhouse-server.service
 8             ├─2774 clickhouse-watchdog        --config=/etc/clickhouse-server/config.xml --pid-file=/run/clickhouse-server/clickhouse-server.pid
 9             └─2787 /usr/bin/clickhouse-server --config=/etc/clickhouse-server/config.xml --pid-file=/run/clickhouse-server/clickhouse-server.pid
10
11Dec 13 09:37:45 ip-10-1-1-5 systemd[1]: Started ClickHouse Server (analytic DBMS for big data).
12Dec 13 09:37:45 ip-10-1-1-5 clickhouse-server[2774]: Processing configuration file '/etc/clickhouse-server/config.xml'.
13Dec 13 09:37:45 ip-10-1-1-5 clickhouse-server[2774]: Logging trace to /var/log/clickhouse-server/clickhouse-server.log
14Dec 13 09:37:45 ip-10-1-1-5 clickhouse-server[2774]: Logging errors to /var/log/clickhouse-server/clickhouse-server.err.log
15Dec 13 09:37:45 ip-10-1-1-5 clickhouse-server[2787]: Processing configuration file '/etc/clickhouse-server/config.xml'.
16Dec 13 09:37:45 ip-10-1-1-5 clickhouse-server[2787]: Saved preprocessed configuration to '/var/lib/clickhouse/preprocessed_configs/config.xml'.
17Dec 13 09:37:45 ip-10-1-1-5 clickhouse-server[2787]: Processing configuration file '/etc/clickhouse-server/users.xml'.
18Dec 13 09:37:45 ip-10-1-1-5 clickhouse-server[2787]: Merging configuration file '/etc/clickhouse-server/users.d/default-password.xml'.
19Dec 13 09:37:45 ip-10-1-1-5 clickhouse-server[2787]: Saved preprocessed configuration to '/var/lib/clickhouse/preprocessed_configs/users.xml'.
Click House Clientを実行し、接続できることを確認します
clickhouse-client --password
 1ClickHouse client version 22.11.2.30 (official build).
 2Password for user (default): password << 先程設定したパスワードを入力してください
 3Connecting to localhost:9000 as user default.
 4Connected to ClickHouse server version 22.11.2 revision 54460.
 5
 6Warnings:
 7 * Maximum number of threads is lower than 30000. There could be problems with handling a lot of simultaneous queries.
 8
 9ip-10-1-1-5.xxx.internal :) q << "q" を入力し、クライアントを終了してください
10Bye.
1行目にClient Version、4行目にClick HouseのVersionが表示されていることがわかります
2. NMSのinstall
1. 事前準備
インストールに利用する証明書・鍵をコピーします。なお、SSL証明書および鍵ファイルは以下に配置済みです
なお、NGINX Plus R33以降はNGINXを起動するためにJWTファイルが必要になります。そのため、本LabではR32を使用しております。
JumpBox:C:\Users\user\Desktop\Key
ubuntu-host1:/home/ubuntu/
sudo mkdir -p /etc/ssl/nginx
sudo cp ~/nginx-repo.* /etc/ssl/nginx
インストールに必要なコンポーネントの取得、Installを行います
wget -qO - https://cs.nginx.com/static/keys/nginx_signing.key | gpg --dearmor | sudo tee /usr/share/keyrings/nginx-archive-keyring.gpg >/dev/null
printf "deb [signed-by=/usr/share/keyrings/nginx-archive-keyring.gpg] https://pkgs.nginx.com/plus/R32/ubuntu `lsb_release -cs` nginx-plus\n" | sudo tee /etc/apt/sources.list.d/nginx-plus.list
printf "deb [signed-by=/usr/share/keyrings/nginx-archive-keyring.gpg] https://pkgs.nginx.com/nms/ubuntu `lsb_release -cs` nginx-plus\n" | sudo tee /etc/apt/sources.list.d/nms.list
sudo wget -P /etc/apt/apt.conf.d https://cs.nginx.com/static/files/90pkgs-nginx
2. NGINX Management Suite(NMS) のインストール
NMSのプラットフォームとなる NGINX Instance Manager(NIM) をインストールします。
その他のコンポーネント(ACMなど)を利用する場合にもこちらのコンポーネントがベースとなりますので、 こちらの手順を実施してください。
sudo apt-get update
sudo apt-get install -y nms-instance-manager
Install時に出力される結果を確認します
  1** 省略 **
  2FQDN [nim.local]:    <-Enterを押してください。
  3You have chosen: nim.local
  4
  5Further certificate generation steps will use this FQDN.
  6 * Creating certificates for NGINX Modules...
  7 *** Generating certificates for NGINX Services: agent-ingest, type - auth_server...
  8 *** Generating certificates for NGINX Services: dataplane-manager, type - auth_server...
  9 *** Generating certificates for NGINX Services: core, type - auth_server...
 10 *** Generating certificates for NGINX Services: integrations, type - auth_server...
 11 *** Generating certificates for NGINX Services: secmon, type - auth_server...
 12 *** Generating certificates for NGINX Services: agent-ingest, type - auth_client...
 13 *** Generating certificates for NGINX Services: dataplane-manager, type - auth_client...
 14 *** Generating certificates for NGINX Services: core, type - auth_client...
 15 *** Generating certificates for NGINX Services: devportal, type - auth_client...
 16 *** Generating certificates for NGINX Services: integrations, type - auth_client...
 17 *** Generating certificates for NGINX Services: secmon, type - auth_client...
 18 * Creating certificates for internal database components...
 19Reloading systemd manager configuration
 20Unmasking the service unit, 'systemctl unmask nms'
 21Setting the preset flag for service unit, 'systemctl preset nms'
 22Created symlink /etc/systemd/system/multi-user.target.wants/nms.service → /lib/systemd/system/nms.service.
 23Unmasking the service unit, 'systemctl unmask nms-core'
 24Setting the preset flag for service unit, 'systemctl preset nms-core'
 25Created symlink /etc/systemd/system/nms.service.wants/nms-core.service → /lib/systemd/system/nms-core.service.
 26Unmasking the service unit, 'systemctl unmask nms-dpm'
 27Setting the preset flag for service unit, 'systemctl preset nms-dpm'
 28Created symlink /etc/systemd/system/nms.service.wants/nms-dpm.service → /lib/systemd/system/nms-dpm.service.
 29Unmasking the service unit, 'systemctl unmask nms-ingestion'
 30Setting the preset flag for service unit, 'systemctl preset nms-ingestion'
 31Created symlink /etc/systemd/system/nms.service.wants/nms-ingestion.service → /lib/systemd/system/nms-ingestion.service.
 32Unmasking the service unit, 'systemctl unmask nms-integrations'
 33Setting the preset flag for service unit, 'systemctl preset nms-integrations'
 34Created symlink /etc/systemd/system/nms.service.wants/nms-integrations.service → /lib/systemd/system/nms-integrations.service.
 35Unmasking the service unit, 'systemctl unmask nms-sm'
 36Setting the preset flag for service unit, 'systemctl preset nms-sm'
 37Created symlink /etc/systemd/system/multi-user.target.wants/nms-sm.service → /lib/systemd/system/nms-sm.service.
 38Created symlink /etc/systemd/system/nms.service.wants/nms-sm.service → /lib/systemd/system/nms-sm.service.
 39Adding user nginx to group nms
 40Adding user www-data to group nms
 41Adding user syslog to group nms
 42Ensuring the log file exists, 'touch /var/log/nms/nms.log'
 43Generating default password for 'admin' user account
 44Using openssl version 1.1.1f
 45Writing admin password to /etc/nms/nginx/.htpasswd
 46Checking if clickhouse-server is installed, 'which clickhouse-server'.
 47/usr/bin/clickhouse-server
 48Restarting rsyslog process
 49----------------------------------------------------------------------
 50NGINX Management Suite package has been successfully installed.
 51
 52Please follow the next steps to Start the software:
 53
 54    # Start the Clickhouse database server
 55    sudo systemctl start clickhouse-server
 56
 57    # Start NGINX web server
 58    sudo systemctl start nginx
 59
 60    # If NGINX is already running, reload it
 61    sudo service nginx reload
 62
 63    # Optional: load the included SELinux policy
 64    sudo semodule -n -i /usr/share/selinux/packages/nms.pp
 65    sudo /usr/sbin/load_policy
 66    sudo restorecon -F -R /usr/bin/nms-core
 67    sudo restorecon -F -R /usr/bin/nms-dpm
 68    sudo restorecon -F -R /usr/bin/nms-ingestion
 69    sudo restorecon -F -R /usr/bin/nms-integrations
 70    sudo restorecon -F -R /usr/bin/nms-sm
 71    sudo restorecon -F -R /usr/lib/systemd/system/nms.service
 72    sudo restorecon -F -R /usr/lib/systemd/system/nms-core.service
 73    sudo restorecon -F -R /usr/lib/systemd/system/nms-dpm.service
 74    sudo restorecon -F -R /usr/lib/systemd/system/nms-ingestion.service
 75    sudo restorecon -F -R /usr/lib/systemd/system/nms-integrations.service
 76    sudo restorecon -F -R /var/lib/nms/modules/manager.json
 77    sudo restorecon -F -R /var/lib/nms/modules.json
 78    sudo restorecon -F -R /var/lib/nms/secrets
 79    sudo restorecon -F -R /var/lib/nms/streaming
 80    sudo restorecon -F -R /var/lib/nms
 81    sudo restorecon -F -R /var/lib/nms/dqlite
 82    sudo restorecon -F -R /var/run/nms
 83    sudo restorecon -F -R /var/lib/nms/modules
 84    sudo restorecon -F -R /var/log/nms
 85
 86    # Enable NGINX Management Suite services
 87    sudo systemctl enable nms nms-core nms-dpm nms-ingestion nms-integrations nms-sm --now
 88
 89    Admin username: admin
 90
 91    Admin password: B8oTVUIK73cRQB11hZv6HZQGY5NUEh
 92
 93Please change this password with your own as soon as possible:
 94https://docs.nginx.com/nginx-instance-manager/admin-guide/authentication/basic-auth/set-up-basic-authentication/
 95
 96For UI access, point your browser to the HTTPS port of this machine.
 97
 98IMPORTANT: By default, NGINX Instance Manager may collect and send anonymized telemetry and interaction information for analysis by F5 NGINX.   This information is used to make improvements to our products and services. Administrators may disable this functionality for all users in the web portal.
 99----------------------------------------------------------------------
100Processing triggers for systemd (245.4-4ubuntu3.6) ...
101Processing triggers for man-db (2.9.1-1) ...
102Processing triggers for rsyslog (8.2001.0-1ubuntu1.1) ...
NIMのAdmin情報は89,91行目の内容となりますので確認してください
設定ファイルの内容の確認します
sudo cp /etc/nms/nms.conf /etc/nms/nms.conf-
sudo vi /etc/nms/nms.conf
Note
こちらに示す設定ファイルはNIM v2.7.0以上 の内容となります
 1# This is default /etc/nms/nms.conf file which is distributed with Linux packages.
 2
 3user: nms
 4daemon: true
 5# Root dqlite db directory. Each sub directory here is dedicated to the process
 6db_root_dir: /var/lib/nms/dqlite
 7
 8# default log level for all processes. Each process can override this level.
 9log:
10  encoding: console
11  level: error
12
13modules:
14  prefix: /var/lib/nms
15  # NMS modules config are available here to be read if installed
16  conf_dir: /etc/nms/modules
17
18core:
19  # enable this for core on tcp
20  # address: 127.0.0.1:8033
21  address: unix:/var/run/nms/core.sock
22  grpc_addr: unix:/var/run/nms/coregrpc.sock
23  analytics:
24    # Catalogs config
25    catalogs:
26      metrics_data_dir: /usr/share/nms/catalogs/metrics
27      events_data_dir: /usr/share/nms/catalogs/events
28      dimensions_data_dir: /usr/share/nms/catalogs/dimensions
29  # Dqlite config
30  dqlite:
31    addr: 127.0.0.1:7891
32  # disable this to prevent automatic cleanup on a module removal of it's RBAC features and permissions
33  disable_rbac_cleanup: false
34
35dpm:
36  # enable this for dpm on tcp
37  # address: 127.0.0.1:8034
38  address: unix:/var/run/nms/dpm.sock
39  # enable this for dpm grpc server on tcp
40  # grpc_addr: 127.0.0.1:8036
41  grpc_addr: unix:/var/run/nms/am.sock
42  # Dqlite config
43  dqlite:
44    addr: 127.0.0.1:7890
45  # NATS config
46  nats:
47    address: nats://127.0.0.1:9100
48    # nats streaming
49    store_root_dir: /var/lib/nms/streaming
50    # 10GB
51    max_store_bytes: 10737418240
52    # 1GB
53    max_memory_bytes: 1073741824
54    # https://docs.nats.io/reference/faq#is-there-a-message-size-limitation-in-nats
55    # 8MB
56    max_message_bytes: 8388608
57
58integrations:
59  # enable this for integrations on tcp
60  # address: 127.0.0.1:8037
61  address: unix:/var/run/nms/integrations.sock
62  # Dqlite config
63  dqlite:
64    addr: 127.0.0.1:7892
65  app_protect_security_update:
66    # Enable this setting to automatically retrieve the latest Attack Signatures and Threat Campaigns.
67    # enable: true
68    # Enable this setting to specify how often, in hours, the latest Attack Signatures and Threat Campaigns are retrieved.
69    # The default interval is 6 hours, the maximum interval is 48 hours, and the minimum is 1 hour.
70    # interval: 6
71    # Enable this setting to specify how many updates to download for the latest Attack Signatures and Threat Campaigns.
72    # By default, the 10 latest updates are downloaded. The maximum value is 20, and the minimum value is 1.
73    # number_of_updates: 10
74
75ingestion:
76  # enable this for ingestion grpc server on tcp
77  # grpc_addr: 127.0.0.1:8035
78  grpc_addr: unix:/var/run/nms/ingestion.sock
79
80# ClickHouse config for establishing a ClickHouse connection
81clickhouse:
82#   # Below address not used if TLS mode is enabled
83  address: 127.0.0.1:9000
84#   # Ensure username and password are wrapped in quotes
85  username: 'default'
86  password: 'password'
87#   # Enable TLS configurations for ClickHouse connections
88#   tls:
89#     # Address pointing to <tcp_port_secure> of ClickHouse
90#     # Below CH address is used when TLS mode is active
91#     tls_address: 127.0.0.1:9440
92#     # Verification should be skipped for self-signed certificates
93#     skip_verify: true
94#     key_path: /path/to/client-key.pem
95#     cert_path: /path/to/client-cert.pem
96#     ca_path: /etc/ssl/certs/ca-certificates.crt
Clickhouse で指定した適切な username 、 password を記述します
NMSを有効にします
sudo systemctl enable nms
sudo systemctl enable nms-core
sudo systemctl enable nms-dpm
sudo systemctl enable nms-ingestion
sudo systemctl enable nms-integrations
NMSを起動します
sudo systemctl start nms
sudo systemctl start nms-core
sudo systemctl start nms-dpm
sudo systemctl start nms-ingestion
sudo systemctl start nms-integrations
NMSが起動していることを確認します
ps aufx | grep nms
1root       12619  0.0  0.0   8160   672 pts/1    S+   16:50   0:00              \_ grep --color=auto nms
2nms        12469  0.1  0.4 1267192 36336 ?       Ssl  16:47   0:00 /usr/bin/nms-ingestion
3nms        12494  0.0  0.5 1257480 42436 ?       Ssl  16:47   0:00 /usr/bin/nms-sm start
4nms        12511  0.2  0.5 1304640 45328 ?       Ssl  16:47   0:00 /usr/bin/nms-integrations
5nms        12537  0.4  0.6 1302140 52588 ?       Ssl  16:47   0:00 /usr/bin/nms-core
6nms        12545  0.7  0.9 1318664 75736 ?       Ssl  16:47   0:01 /usr/bin/nms-dpm
NGINX Web Serverを再起動します
sudo systemctl restart nginx
NGINXが正しく起動していることを確認します
sudo systemctl status nginx
 1● nginx.service - A high performance web server and a reverse proxy server
 2     Loaded: loaded (/lib/systemd/system/nginx.service; enabled; vendor preset: enabled)
 3     Active: active (running) since Tue 2022-12-13 10:50:05 UTC; 12s ago
 4       Docs: man:nginx(8)
 5    Process: 18761 ExecStartPre=/usr/sbin/nginx -t -q -g daemon on; master_process on; (code=exited, status=0/SUCCESS)
 6    Process: 18775 ExecStart=/usr/sbin/nginx -g daemon on; master_process on; (code=exited, status=0/SUCCESS)
 7   Main PID: 18776 (nginx)
 8      Tasks: 3 (limit: 4652)
 9     Memory: 4.2M
10     CGroup: /system.slice/nginx.service
11             ├─18776 nginx: master process /usr/sbin/nginx -g daemon on; master_process on;
12             ├─18777 nginx: worker process
13             └─18778 nginx: worker process
14
15Dec 13 10:50:05 ip-10-1-1-5 systemd[1]: nginx.service: Succeeded.
16Dec 13 10:50:05 ip-10-1-1-5 systemd[1]: Stopped A high performance web server and a reverse proxy server.
17Dec 13 10:50:05 ip-10-1-1-5 systemd[1]: Starting A high performance web server and a reverse proxy server...
18Dec 13 10:50:05 ip-10-1-1-5 systemd[1]: Started A high performance web server and a reverse proxy server.
3. API Connectivity Manager(ACM)のインストール
こちらの手順は Install NGINX Management Suite Modules の API CONNECTIVITY MANAGER のタブを参考にしています
なお、API Connectivity Managerは2024年1月1日にEoSのため参考として掲載しております。
ACMをインストールします
# sudo apt-get update
sudo apt-get install -y nms-api-connectivity-manager
NMSを起動します
sudo systemctl enable nms-acm

sudo systemctl restart nms
sudo systemctl restart nms-core
sudo systemctl restart nms-dpm
sudo systemctl restart nms-ingestion
sudo systemctl restart nms-integrations
sudo systemctl restart nginx
sudo systemctl start nms-acm
ACMが正しく起動していることを確認します
sudo systemctl status nms-acm
 1● nms-acm.service - NGINX Management Suite - API Connectivity Manager
 2     Loaded: loaded (/lib/systemd/system/nms-acm.service; enabled; vendor preset: enabled)
 3     Active: active (running) since Fri 2023-02-10 02:43:05 UTC; 27s ago
 4       Docs: https://www.nginx.com/products/api-connectivity-manager
 5   Main PID: 12451 (nms-acm)
 6      Tasks: 13 (limit: 9445)
 7     Memory: 18.2M
 8     CGroup: /system.slice/nms-acm.service
 9             └─12451 /usr/bin/nms-acm server
10
11Feb 10 02:43:08 ip-10-1-1-6 acm[12451]: [INFO]         acm                                          templates/service.go:119     >
12Feb 10 02:43:08 ip-10-1-1-6 acm[12451]: [INFO]         acm                                          templates/service.go:119     >
13Feb 10 02:43:08 ip-10-1-1-6 acm[12451]: [INFO]         acm                                          templates/service.go:119     >
14Feb 10 02:43:08 ip-10-1-1-6 acm[12451]: [INFO]         acm                                          templates/service.go:119     >
15Feb 10 02:43:08 ip-10-1-1-6 acm[12451]: [INFO]         acm                                          templates/service.go:119     >
16Feb 10 02:43:08 ip-10-1-1-6 acm[12451]: [INFO]         acm                                          templates/service.go:119     >
17Feb 10 02:43:08 ip-10-1-1-6 acm[12451]: [INFO]         acm                                          templates/service.go:119     >
18Feb 10 02:43:08 ip-10-1-1-6 acm[12451]: [INFO]         acm                                          templates/service.go:119     >
19Feb 10 02:43:08 ip-10-1-1-6 acm[12451]: [INFO]         acm                                          templates/service.go:37      >
20Feb 10 02:43:09 ip-10-1-1-6 acm[12451]: [INFO]         acm                                          templates/service.go:61      >
プロセスの動作状況の結果を参考に示します
ps aufx | grep nms
1ubuntu     12607  0.0  0.0   8160   672 pts/0    S+   02:55   0:00              \_ grep --color=auto nms
2nms        12385  0.2  0.7 1376852 62380 ?       Ssl  02:43   0:01 /usr/bin/nms-core
3nms        12435  0.3  0.7 1379940 63544 ?       Ssl  02:43   0:02 /usr/bin/nms-dpm
4nms        12479  0.1  0.3 1265868 31216 ?       Ssl  02:43   0:01 /usr/bin/nms-ingestion
5nms        12515  0.0  0.5 1334052 42072 ?       Ssl  02:43   0:00 /usr/bin/nms-integrations
6nms        12595  1.1  0.7 1268892 63196 ?       Ssl  02:53   0:01 /usr/bin/nms-acm server
4. WAF Compilerのインストール
こちらの手順は Set Up App Protect WAF Configuration Management を参考にしています
WAF Compilerをインストールします
# sudo apt-get update
sudo apt-get install -y nms-nap-compiler-v5.144.0
NMSを起動します
sudo systemctl restart nms-integrations
プロセスの動作状況の結果を参考に示します。 Compilerの名称のプロセスは動作しません。
ps aufx | grep nms
1ubuntu     18301  0.0  0.0   8160   672 pts/0    S+   03:09   0:00              \_ grep --color=auto nms
2nms        12988  0.2  0.7 1378084 59972 ?       Ssl  03:00   0:01 /usr/bin/nms-core
3nms        13046  0.4  0.7 1380308 59392 ?       Ssl  03:00   0:02 /usr/bin/nms-dpm
4nms        13089  0.1  0.4 1265868 32516 ?       Ssl  03:00   0:00 /usr/bin/nms-ingestion
5nms        13180  0.2  0.5 1334620 42576 ?       Ssl  03:01   0:01 /usr/bin/nms-acm server
6nms        18269  1.2  0.3 1284656 29796 ?       Ssl  03:09   0:00 /usr/bin/nms-integrations
3. NMS への接続
対象となるホストのIPアドレスを確認し、 踏み台ホストにてChromeを開き、 https://<ホストのIPアドレス>/ui に接続してください
なお、すでにライセンス適用済みのNIMインスタンスがあり、NIM UI からアクセス可能です。Username admin 、 Password は password でログインしてください。
以下の様にTop画面が表示されます
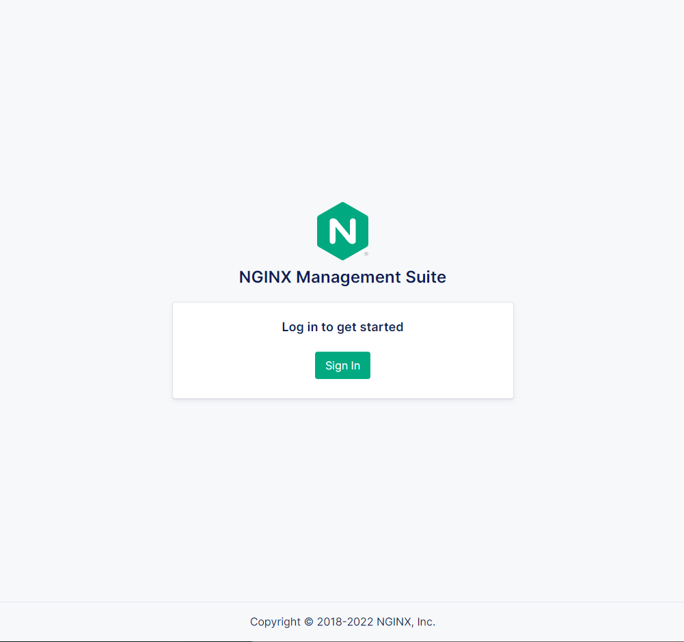
Sign In をクリックすると Basic認証によるポップアップが表示されます。Username admin 、 Password は Install時の出力で予め確認した文字列 を入力してください
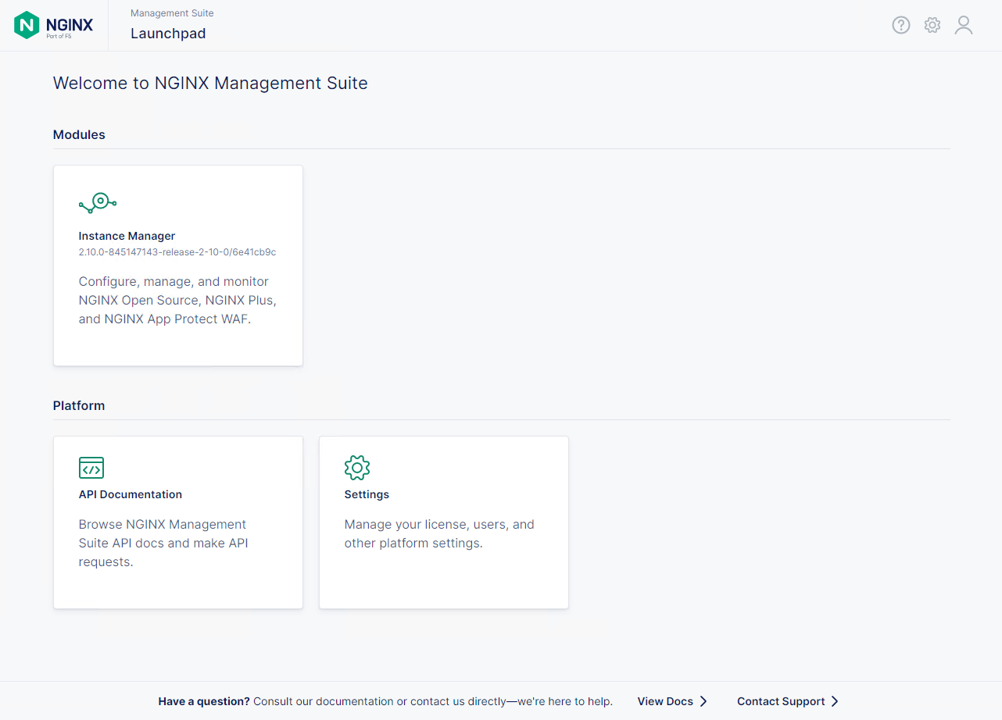
ログインが完了すると以下のような画面が表示されます
(Option) NMS の Version確認
正しく意図したバージョンがインストールされていることを確認してください。
1$ dpkg -l | grep nms
2ii  nms-api-connectivity-manager     1.4.1-762997411~focal              amd64        NGINX Management Suite ACM Module.
3ii  nms-instance-manager             2.8.0-759861272~focal              amd64        NGINX Management Suite - Instance Manager (core system)
4ii  nms-nap-compiler-v4.2.0          4.2.0-1~focal                      amd64        NGINX App Protect repackaged compiler for compatability with NGINX Instance Manager
5ii  nms-sm                           1.2.0-751410248~focal              amd64        NGINX Security Monitoring Dashboard Module
以下コマンドを使ってインストールしたNIMの詳細情報を確認いただけます
dpkg -s nms-instance-manager
 1Package: nms-instance-manager
 2Status: install ok installed
 3Priority: optional
 4Installed-Size: 208328
 5Maintainer: NGINX Packaging <nginx-packaging@f5.com>
 6Architecture: amd64
 7Version: 2.8.0-759861272~focal
 8Depends: adduser, gawk, lsb-release, nginx-plus (>= 22) | nginx (>= 1.18.0), openssl, rsyslog, systemd, tar
 9Recommends: clickhouse-server (>= 21.3.19.1), openssl (>= 1.1.1)
10Conffiles:
11 /etc/logrotate.d/nms.conf 9c4dc2b56a4496bb35547f205a81d750
12 /etc/nginx/conf.d/nms-http.conf e9f45890256ca87cc64737de6aeb998f
13 /etc/nms/nginx/.htpasswd d41d8cd98f00b204e9800998ecf8427e
14 /etc/nms/nginx/errors-grpc.loc_conf 602e26ca21e12a11262c170f88e90c38
15 /etc/nms/nginx/errors-grpc.server_conf 73f48a717d8e7cb6ce73cdc22efc67b3
16 /etc/nms/nginx/errors.http_conf 73f1d2692f94440ad35c1c4934dc08cd
17 /etc/nms/nginx/oidc/openid_configuration.conf 42b3c5cb96e5b8a0df87d8c882e59077
18 /etc/nms/nginx/upstreams/README.md f29b0fe2b4d6856f26f7286f3c9e0579
19 /etc/nms/nginx/upstreams/mapped_apis/README.md c287571d3c9cddf6a85d2cdd6fc14dae
20 /etc/nms/nms.conf 88e66e7f0f891bb3c4d8dc0ac7871f6e
21 /etc/rsyslog.d/nms.conf 3fdc4c5ef473f05d85251266b30d8521
22 /usr/lib/systemd/system/nms-core.service 3bb5bb05e05e9dd1ff62d6f9ea650e3b
23 /usr/lib/systemd/system/nms-dpm.service 9ee5e027e6694ee988c78eff4e043a26
24 /usr/lib/systemd/system/nms-ingestion.service 69c2bf77c707f59b2f58f9bae0525d66
25 /usr/lib/systemd/system/nms-integrations.service 23012c3c61c0df2046e65131cbab1fc7
26 /usr/lib/systemd/system/nms.service 99ce4153417884beb7dac8556544c75c
27 /var/lib/nms/modules.json 58e0494c51d30eb3494f7c9198986bb9
28Description: NGINX Management Suite - Instance Manager (core system)
29Homepage: https://www.nginx.com/products/nginx-instance-manager/